I still remember the first time I made Fantasy Fudge. My mother handed me a worn index card with the recipe written in her loopy handwriting. I was in my twenties, nervous about holiday baking, and honestly not sure I could pull it off. But that first batch came out smooth, creamy, and absolutely perfect. Now, decades later, I make Fantasy Fudge every single holiday season. It never disappoints. If you are looking for a recipe that feels special but does not require professional skills, this is it. Whether you are a seasoned baker or just starting out, this recipe is for you.
This post is my way of passing that index card along to you. I want you to feel confident in your kitchen, have fun with the process, and end up with a pan of the most delicious fudge you have ever tasted. Let us get into it.
Why Fantasy Fudge Belongs in Your Recipe Box
Fantasy Fudge is one of those recipes that has stood the test of time for a reason. It first appeared on the back of a Kraft Jet-Puffed Marshmallow Creme jar decades ago, and home cooks across America have been making it ever since. The reason is simple. It works every single time when you follow the steps.
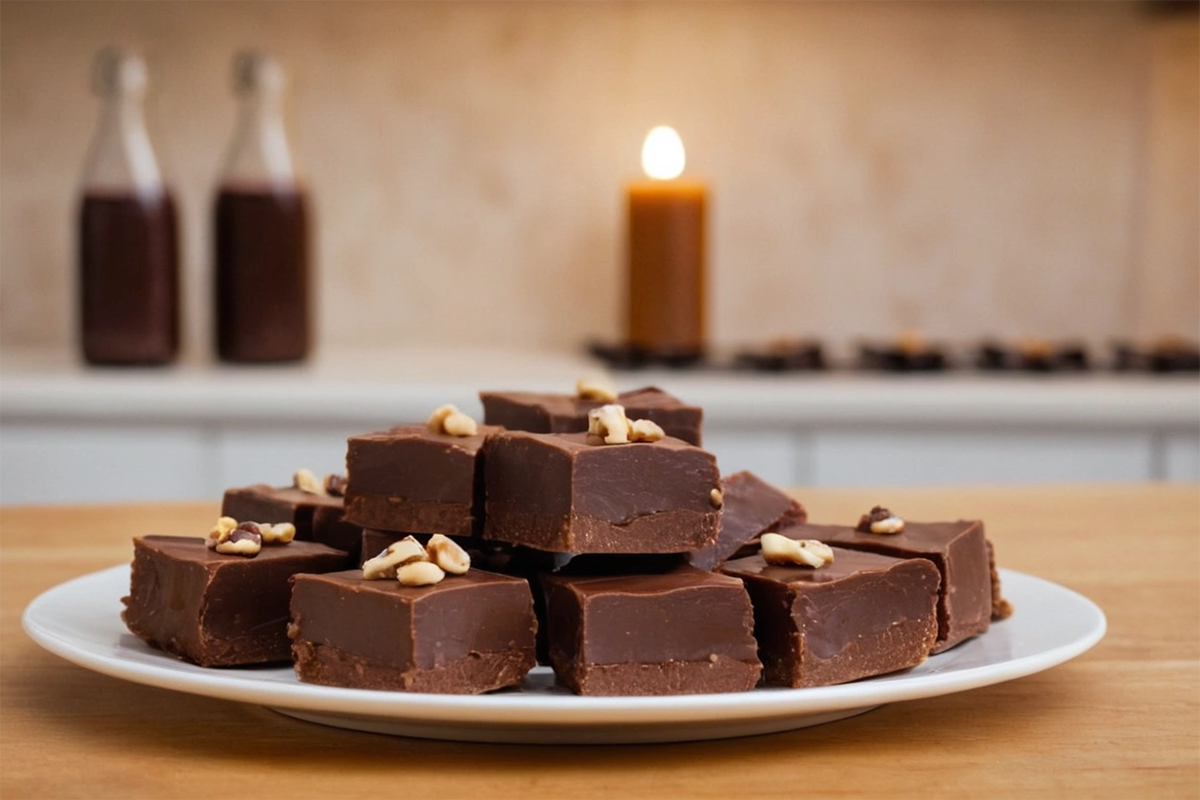
The texture is what sets Fantasy Fudge apart from other chocolate fudge recipes. It comes out silky, dense, and creamy without being grainy. The flavor is rich chocolate with a subtle buttery sweetness that is not overwhelming. Each square melts on your tongue in the best possible way. You get that old-fashioned candy shop quality right in your own kitchen.
This recipe is also incredibly budget-friendly. You can make a large batch for gift boxes, holiday parties, or bake sales without spending a fortune. It is also a great recipe to make with kids or grandkids. The steps are straightforward, and the reward is huge. For a deeper look at the original recipe history, check out this original Fantasy Fudge guide on Allrecipes.
Ingredients for Fantasy Fudge
Here is everything you need to make Fantasy Fudge. These ingredients are easy to find at any grocery store.
Main Ingredients:
- Granulated sugar — forms the sweet base of the fudge; use plain white sugar for the best result
- Unsalted butter — adds richness and helps create the creamy texture; cut into pieces before melting
- Evaporated milk — not sweetened condensed milk; evaporated milk gives the fudge its smooth consistency
- Semi-sweet chocolate chips — the star of the recipe; use a good quality brand for the best flavor
- Marshmallow creme — this is the secret weapon; it keeps the fudge soft and prevents graininess
- Vanilla extract — adds depth to the chocolate flavor; pure vanilla works best
- Chopped walnuts (optional) — adds crunch and a nutty contrast to the sweet chocolate
Tools Needed
You do not need fancy equipment to make Fantasy Fudge. Here is what to have ready before you start.
- Heavy-bottomed saucepan (3-quart size works well)
- Wooden spoon or heat-safe silicone spatula
- Candy thermometer (highly recommended for accuracy)
- 9×13 inch baking pan
- Parchment paper or aluminum foil
- Measuring cups and spoons
- Large mixing bowl
- Sharp knife for cutting the finished fudge
Step-by-Step Instructions for Fantasy Fudge
Making Fantasy Fudge comes down to getting the sugar mixture to the right temperature. Do not rush this part. Follow these steps carefully and you will get perfect results.
- Prepare your pan. Line a 9×13 inch pan with foil or parchment paper. Lightly grease it with butter or non-stick spray. Set aside.
- Combine sugar, butter, and evaporated milk. Add all three to your heavy saucepan over medium heat. Stir constantly as the butter melts.
- Bring to a rolling boil. Keep stirring as the mixture heats. Once it reaches a full rolling boil, start your timer. Cook for exactly 4 minutes while stirring constantly.
- Check the temperature. Your candy thermometer should read 234°F to 240°F. This is the soft-ball stage and the key to smooth Fantasy Fudge.
- Remove from heat immediately. Take the saucepan off the burner as soon as you hit the right temperature.
- Add the chocolate chips and marshmallow creme. Pour both into the hot sugar mixture. Stir quickly and vigorously until everything is fully melted and smooth.
- Stir in vanilla and nuts. Add your vanilla extract and walnuts if using. Mix until fully combined.
- Pour into your prepared pan. Spread the Fantasy Fudge mixture evenly using your spatula. Work fast because it sets quickly.
- Let it cool completely. Allow the pan to sit at room temperature for at least 2 hours before cutting. Do not rush this step.
- Cut into squares. Lift the fudge out using the foil or parchment. Cut into even squares with a sharp knife.
Tips for a Perfect Result
These tips will help you get the best Fantasy Fudge every single time.
- Use a candy thermometer. Guessing the temperature is the number one reason fudge fails. A thermometer removes all the guesswork and gives you consistent results with Fantasy Fudge batch after batch.
- Stir constantly during boiling. Do not walk away from the stove. Constant stirring prevents the sugar from scorching on the bottom of the pan.
- Work quickly after removing from heat. Fantasy Fudge sets fast once you add the chocolate and marshmallow creme. Have everything measured and ready before you start.
- Do not double the batch in one pan. If you need more, make two separate batches. Doubling the recipe changes the cooking time and can result in uneven texture.
- Line your pan well. Proper lining makes it easy to lift out the fudge cleanly and cut perfect squares without it sticking.
Serving Suggestions and Variations
Fantasy Fudge is wonderful on its own, but there are plenty of ways to change it up and make it your own.
Serving Ideas:
- Arrange squares on a holiday cookie platter alongside peanut butter blossoms and shortbread.
- Wrap individual pieces in wax paper and tie with a ribbon for a homemade gift.
- Set out a plate at a party with a small sign so guests know what they are getting into.
- Pair with a cup of hot coffee or cocoa for an afternoon treat.
Easy Variations:
- Peanut Butter Fantasy Fudge: Swap half the chocolate chips for peanut butter chips. The combination is outstanding. You can find a great version of this at My Country Table’s peanut butter Fantasy Fudge recipe.
- White Chocolate Fantasy Fudge: Replace the semi-sweet chips with white chocolate chips and add a drop of almond extract.
- Rocky Road Fantasy Fudge: Stir in mini marshmallows and extra walnuts right before pouring into the pan.
- Mint Chocolate Fantasy Fudge: Add a half teaspoon of peppermint extract along with the vanilla for a festive holiday spin.
For another delightful chocolate treat, consider making our rich fudge cookies that are perfect for any occasion.
Storage and Make-Ahead Instructions
One of the best things about Fantasy Fudge is how well it stores. You can make it days ahead and it will taste just as good.
Room Temperature Storage:
Place cut squares in an airtight container with parchment paper between the layers. Fantasy Fudge keeps well at room temperature for up to 2 weeks. Store it in a cool, dry spot away from direct sunlight or heat.
Refrigerator Storage:
If your kitchen runs warm, store the container in the fridge. The fudge will stay fresh for up to 3 weeks. Let it come to room temperature before serving for the best texture.
Freezer Instructions:
Fantasy Fudge freezes beautifully. Wrap squares individually in plastic wrap, then place them in a zip-top freezer bag. It keeps in the freezer for up to 3 months. Thaw overnight in the refrigerator or for 30 minutes on the counter before serving.
Make-Ahead Tip:
You can make Fantasy Fudge up to two weeks before the holidays. Store it in the freezer and pull it out a day before you need it. This makes holiday prep so much easier.
Frequently Asked Questions
Why did my Fantasy Fudge turn out grainy?
Grainy fudge usually means the sugar mixture did not reach the correct temperature. Always use a candy thermometer and cook to the soft-ball stage between 234°F and 240°F. Stirring too little during the boil can also cause graininess.
Can I make Fantasy Fudge without a candy thermometer?
You can use the cold water test as a backup. Drop a small amount of the boiling mixture into a glass of cold water. If it forms a soft, pliable ball, you have hit the right stage. A thermometer is still the most reliable method for perfect Fantasy Fudge.
What is the difference between Fantasy Fudge and regular fudge?
The key difference is the marshmallow creme. Regular fudge relies entirely on precise sugar cooking. Fantasy Fudge uses marshmallow creme as an stabilizer, which makes it more forgiving and gives it that extra-creamy texture.
Why is my Fantasy Fudge too soft and not setting?
Soft fudge usually means the sugar mixture was undercooked. Make sure you reach the full soft-ball stage temperature. Also, allow the fudge to cool completely at room temperature before cutting. Rushing the cooling process leads to soft, sticky results.
Can I use sweetened condensed milk instead of evaporated milk?
No. These two products are very different. Sweetened condensed milk has added sugar and a different consistency. Using it in Fantasy Fudge will throw off the texture and make the fudge far too sweet. Stick with evaporated milk for the original result.
Nutrition Info
| Nutrient | Per Serving (1 square) |
|---|---|
| Calories | 120 kcal |
| Total Carbohydrates | 18g |
| Protein | 1g |
| Total Fat | 5g |
| Saturated Fat | 3g |
| Cholesterol | 10mg |
| Sodium | 35mg |
| Sugar | 16g |
| Fiber | 0.5g |
This Recipe Is Worth Every Minute
Fantasy Fudge is one of those recipes you will come back to year after year. It is simple, reliable, and genuinely delicious. Whether you are making it for the holidays, a bake sale, or just because you want something sweet, it always delivers. The creamy texture and rich chocolate flavor make every square feel like a little treat worth savoring.
Now it is your turn. Pull out that saucepan, grab your candy thermometer, and make a batch of Fantasy Fudge this weekend. Once you taste it fresh, you will understand why this recipe has been a family favorite across America for generations.
If you make this recipe, leave a comment below and tell me how it turned out. Share it with a friend who loves to bake. Tag your photos and spread the love for this timeless classic.
Craving more decadent chocolate? Our red velvet brownies offer a unique twist on a classic favorite.
Fantasy Fudge
Equipment
- 1 Heavy-Bottomed Saucepan (3-quart size)
- 1 Candy Thermometer (highly recommended)
- 1 9×13-inch Baking Pan
- 1 Silicone spatula or wooden spoon
- 1 Parchment Paper or aluminum foil
Ingredients
Main Ingredients
- 3 cups granulated sugar plain white sugar works best
- 3/4 cup unsalted butter cut into pieces before melting
- 2/3 cup evaporated milk not sweetened condensed milk
- 12 oz semi-sweet chocolate chips use a good quality brand
- 7 oz marshmallow creme one standard jar
- 1 tsp vanilla extract pure vanilla works best
- 1 cup chopped walnuts optional, adds crunch
Instructions
- Prepare your pan. Line a 9×13 inch pan with foil or parchment paper. Lightly grease it with butter or non-stick spray. Set aside.
- Combine sugar, butter, and evaporated milk. Add all three to your heavy saucepan over medium heat. Stir constantly as the butter melts.
- Bring to a rolling boil. Keep stirring as the mixture heats. Once it reaches a full rolling boil, start your timer. Cook for exactly 4 minutes while stirring constantly.
- Check the temperature. Your candy thermometer should read 234°F to 240°F. This is the soft-ball stage and the key to smooth Fantasy Fudge.
- Remove from heat immediately. Take the saucepan off the burner as soon as you hit the right temperature.
- Add the chocolate chips and marshmallow creme. Pour both into the hot sugar mixture. Stir quickly and vigorously until everything is fully melted and smooth.
- Stir in vanilla and nuts. Add your vanilla extract and walnuts if using. Mix until fully combined.
- Pour into your prepared pan. Spread the Fantasy Fudge mixture evenly using your spatula. Work fast because it sets quickly.
- Let it cool completely. Allow the pan to sit at room temperature for at least 2 hours before cutting. Do not rush this step.
- Cut into squares. Lift the fudge out using the foil or parchment. Cut into even squares with a sharp knife.
